
How To Change WiFi Password – Explained Completely
If someone stealing your bandwidth by hack your Wi-Fi password or if you’re think it’s time to change your password because it’s get old and maybe everyone knows it or if you forget your WiFi password and you want to reset or change it? Then don’t worry about it because in this article I’m gonna show you how you can easily change your Wi-Fi password by doing some simple steps and secure your WiFi network.
You can also change the password by the help of your smartphone also; you’ll just need to follow the instruction given below.
So Let’s See
To change a password you’ll need to go through three main steps and those are:
So, let’s start with the first one:
#1-CONNECTION
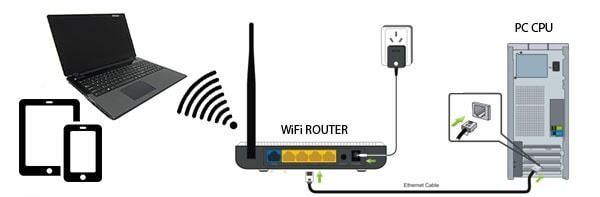
The main thing what we need to do first is to make a connection between your WiFi router and your computer device because all the configuration setting is saved in the router and for changing it we’ll need to connect it first.
If you’re using computer or laptop then you have two options to choose for connect your WiFi router by the use of LAN cable or your internal WiFi signal adapter, whatever you’ve comfortable with.
If you’re using your smart phone to change password then you should connect to your router by using your mobile WiFi feature.
If you forgot your password and you are also not able to connect to your wireless network then reset your router by press the reset button on the back of your router for 5-10 sec. after resetting your router, connect it with your computer and do the above process to get the gateway IP.

#2- Open Router Page
After connecting your laptop or mobile device to the WiFi you’ll need to find the gateway IP address to open your router’s main page we are doing that because The router main configuration page is a webpage installed in your router where you can make changes in settings, like password, time and date, security and many more.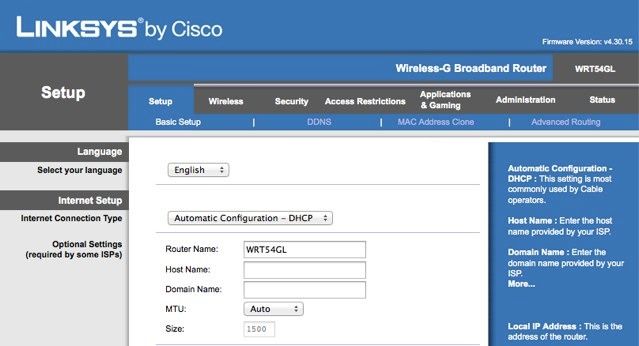
The process of finding the Gateway IP address is different in very operating system so, I listed the process only for some famous operating systems as you can see below:
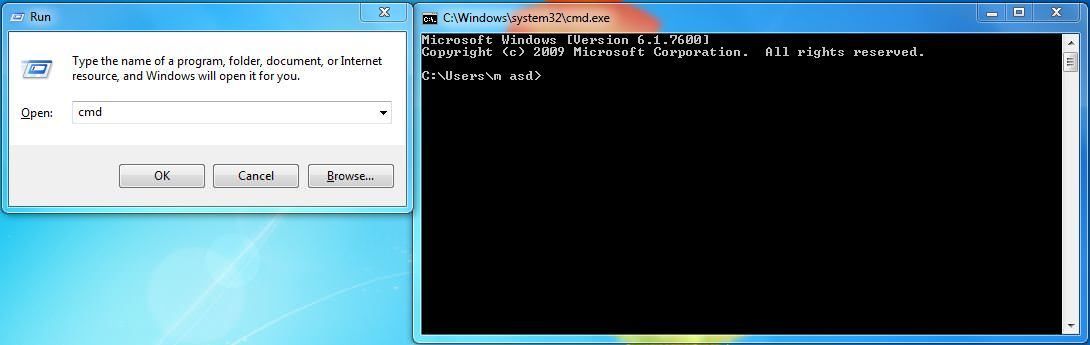
To find your Gateway IP Address you’ll have to connect the router to your computer. If you do connected your computer already to the WiFi, then open the “command prompt” feature on your computer by using the Windows + R key and type “cmd” command on it.
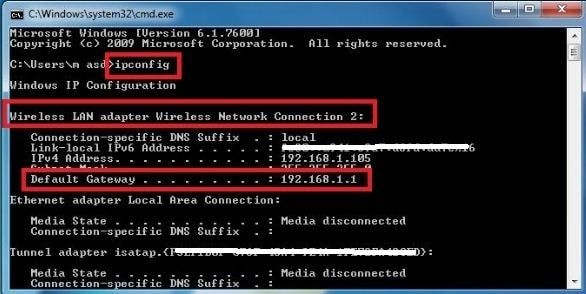
After that type “ipconfig” on cmd and press enter. Now you will able to see your wireless network gateway IP.
If you’ve connected your router by LAN cable then the default gateway IP shown under the Ethernet adaptor category in your CMD.
First you’ll need to click on the Apple menu button on the upper left part of the screen and then sleet the System Preferences option. After that select the “Network” setting in the “System Preferences” menu.
In the Network setting, select the network adapter you’re interested in. Your IP address will appear in the right-hand pane of the window.

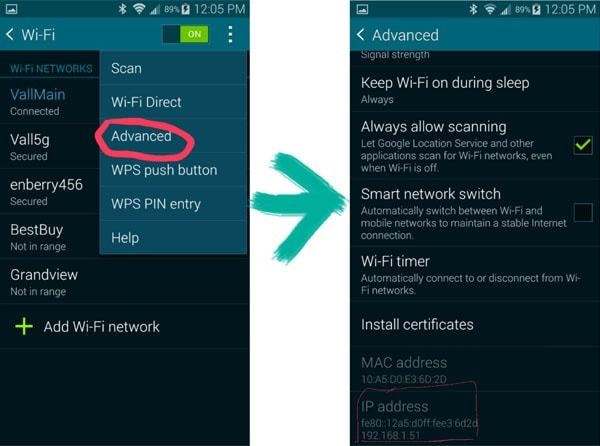
On your Android phone, press the menu button and go to Settings -> WiFi settings. If you aren’t already connected to a WiFi network, then connect it now. Now your phone shows you some IP like “192.168.1.25” or maybe some other IP, it’s the IP address what your router gives to your phone and that means your router main gateway IP is 192.168.1.1, just change the last digit to 1 and that’s your router IP.
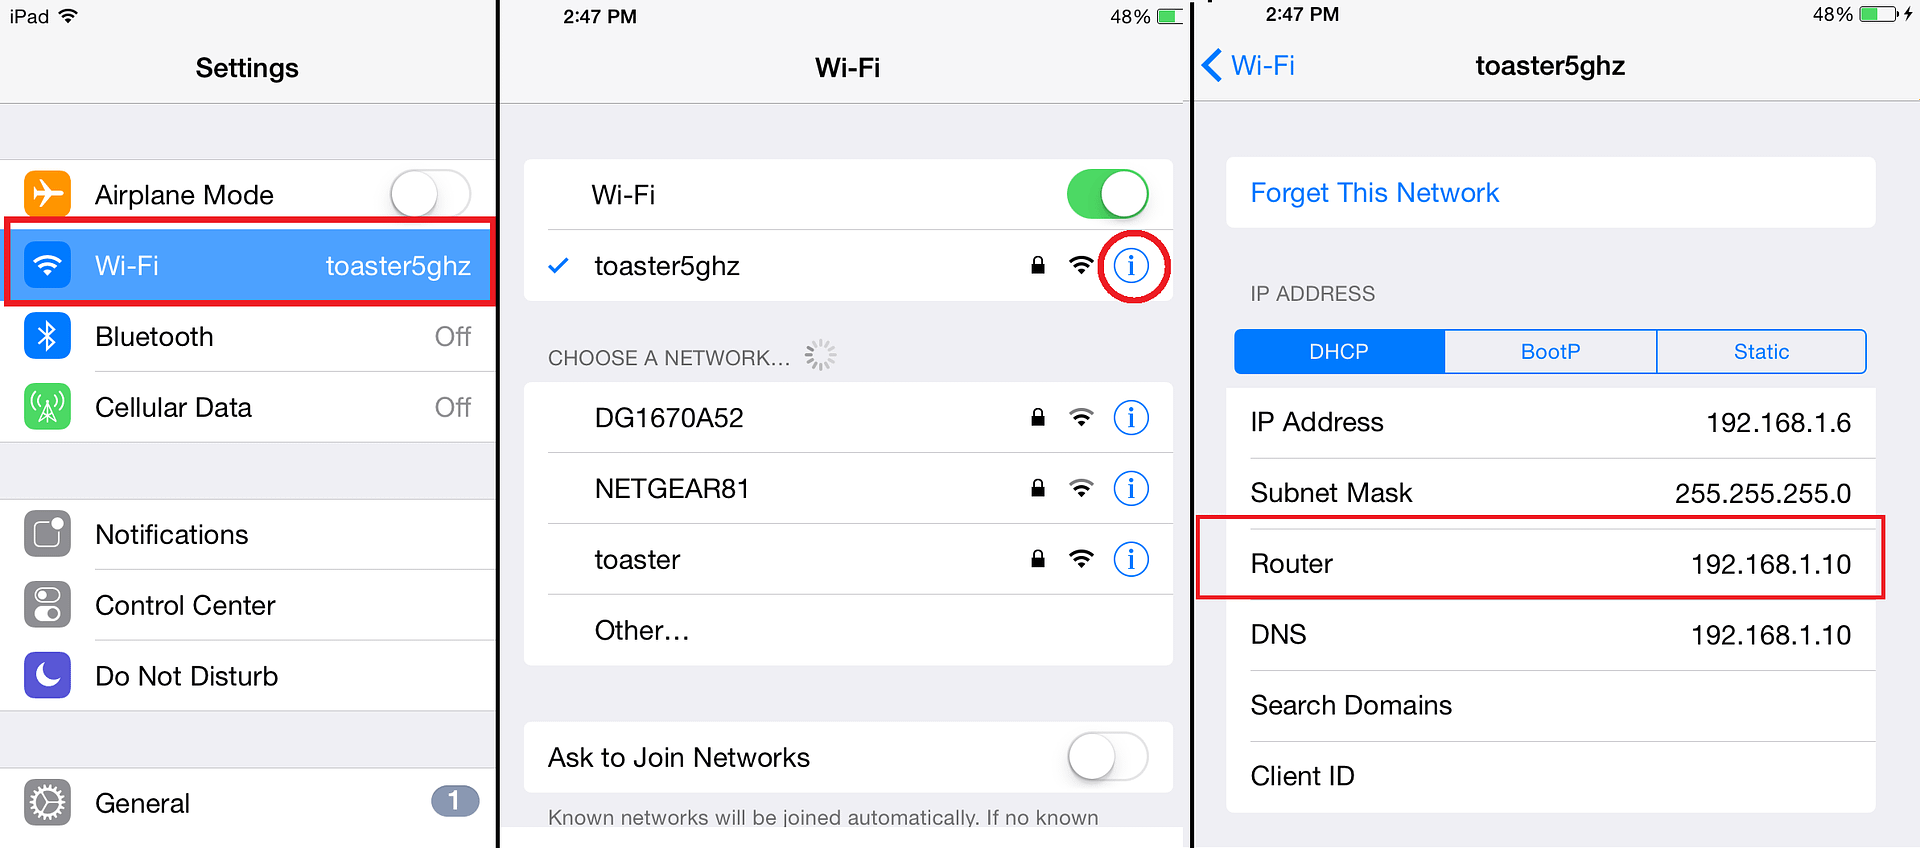
- Press to select Settings from your Springboard.
- Select the WiFi from the Settings menu.
- Select your network if it isn’t already selected.
OR
Here’s a list of default gateway IP Address of some WiFi manufacturers.- Linksys – 192.168.1.1 or 192.168.0.1
- Netgear – 192.168.0.1 or 192.168.0.227
- ASUS – 192.168.1.1
- D-Link – 192.168.0.1 or 10.0.0.1
- Apple – 10.0.1.1
- Buffalo – 192.168.11.1
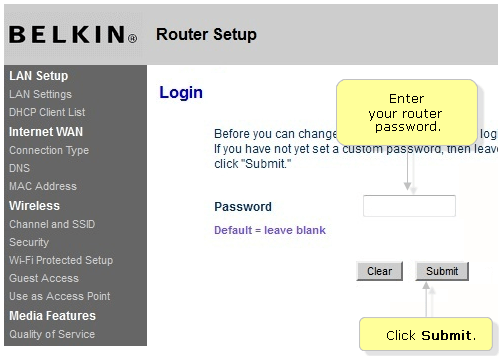
#it’s time to open router page
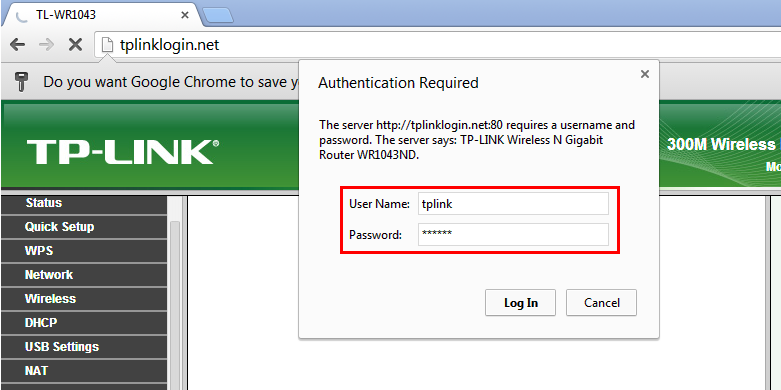
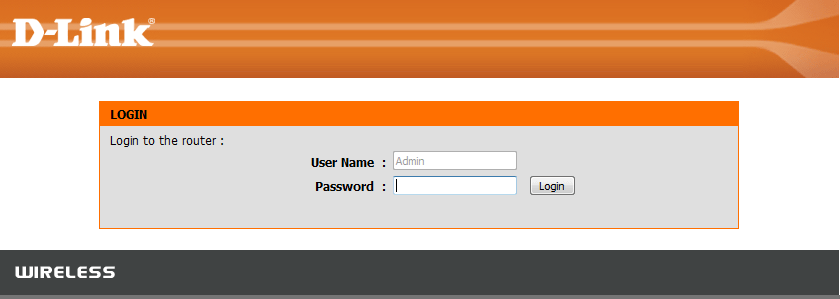
To open router’s configuration page you will need the gateway IP. I think now you’ve known your gateway IP by doing above procedure.So, now open your computer’s or phone’s browser and type the gateway IP and press enter. After that the web page will ask you to enter the username and password, type the username is “admin” and the password is “admin” or you can use “password” as password, if admin word not works for you to open the configuration page. Here are the examples of two different router’s login page given below –
#3- Changing & Saving Setting
Now the main configuration page is opened in front of you and for changing password: Select
the wireless setting tab on the configuration page of your router. Now
you are able to change your Wi-Fi password and the network’s name too. I
prefer you to select the “WPA2” security because that security not
hacks easily and gives you more protection to your network. Save the
setting after makes changes and restart your modem too.
Select
the wireless setting tab on the configuration page of your router. Now
you are able to change your Wi-Fi password and the network’s name too. I
prefer you to select the “WPA2” security because that security not
hacks easily and gives you more protection to your network. Save the
setting after makes changes and restart your modem too.The above given procedure works for all wifi routers and if you wanna more perfect step by step guide then you can check the procedure given below by selecting your router brand name.
Source: http://www.dlink.com/ Step 1: Open the browser in your computer or mobile and enter “192.168.0.1” or “http://dlinkrouter” or “http://dlinkrouter.local” into the address bar.
Step 2: Now it will ask you to enter the admin or password and the default username is “Admin” and the password is blank (nothing). Just Click Login.
Step 3: Now click on the Setup tab at the top and click Wireless Settings on the left side panel.
Step 4: After that click on “Manual Wireless Network Setup” button.
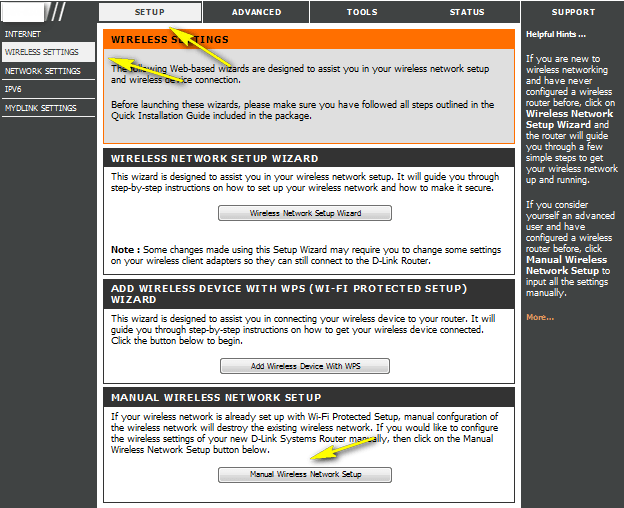
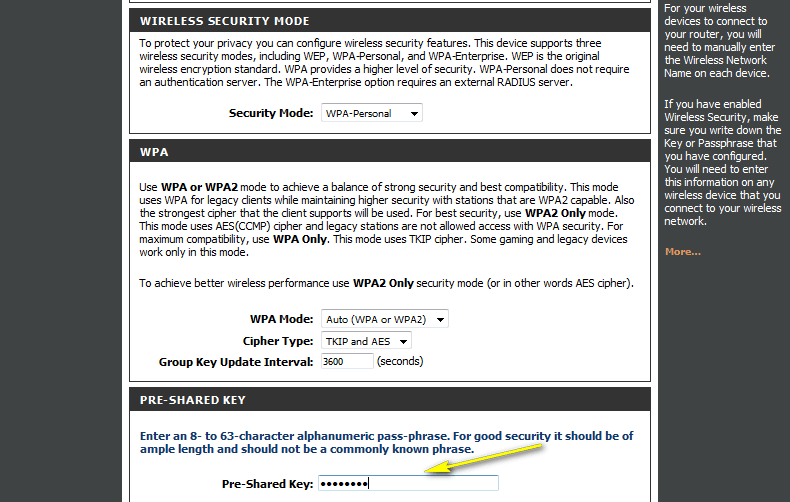
Step 5: Now scroll down the page to the “Wireless Security Mode” setting.
This is the main setting where you enter your wireless password. You can specify a new password; be sure to click Save Settings at the top of the page once complete.
Source: http://www.tplink.com/ Step 1 – Use an Ethernet Lan cable to connect your computer to one of the LAN ports at the back panel of the wifi router or maybe you can connect it via the wireless connection by using laptop’s or phone wifi.
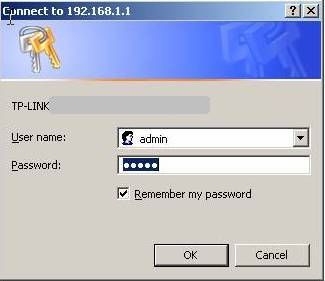
Step 2 – Open the web browser and enter http://192.168.1.1 if that won’t work try this “http://192.168.0.1” or this http://tplinklogin.net in the address bar.
Note: The LAN IP changes by the model numbers you can also find it on the bottom label of the product.

Step 3 – Now enter the username and password in the router’s login page. The default username and password both are admin.
Step 4 – After that go to Wireless ->Wireless Security page, and find your previous saved password under the type of security what you have selected at back then.
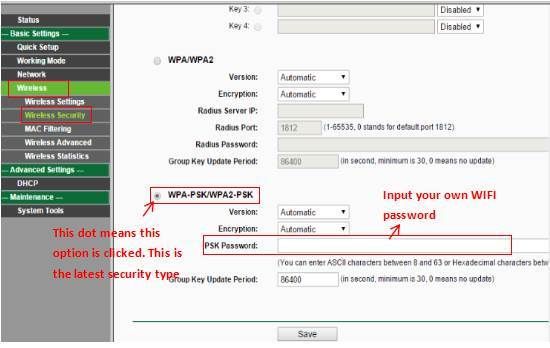
Step 5 – If you have changed the password, please click the Save button and after that you’ll need to reboot the router.
Source: http://kb.netgear.com/ Step 1 – Start your Internet browser and type www.routerlogin.net into the address bar and if shows page cannot be displayed or is blank then try this
- www.routerlogin.net
- www.routerlogin.com
- http://192.168.0.1
- http://192.168.1.1
Step 3 – Now click on “Wireless Settings” under the “Setup” option.
Step 4 – Now you can see your password, just change it whatever you’ve wanted to enter.
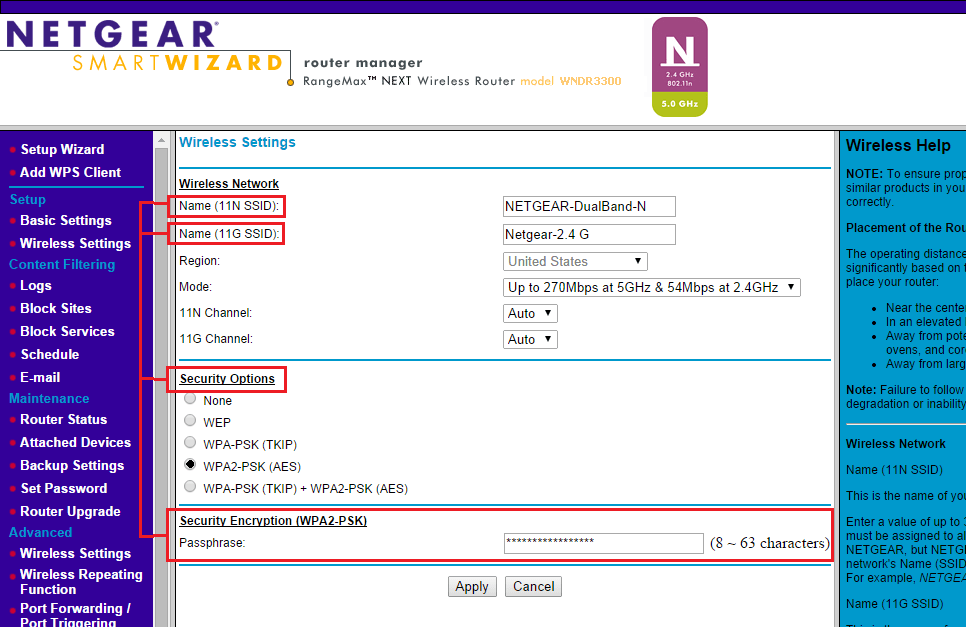
Step 5 – After that remember to click on “Apply” to save all the changes.
Note: If you are using WEP security (not recommended), the screen will look slightly different. If yes then I want you to change your security setting to “WPA2-PSK (AES)” to make your network more secure.
For smart phone user you can also use the NETGEAR iOS, Android, or Desktop “genie app” to change your WiFi password.
- First you’ll need to navigate to the “Utilities” option, which is mainly located in the “Applications” section of your Mac hard drive.
- After that Double click on the “AirPort Utility” icon and that will open the AirPort configuration program which will starts to scan for nearby AirPort wireless routers.
- Select your apple AirPort wireless router from that list and then click on “Manual Setup” option at the bottom.
- Now select the “Wireless” tab at the top.
- And after that enter your new password for your WiFi router network in the “Wireless password” field and reenter the password again in the “Verify Password” also for verifying it.
- At last click on the “Update” button to save all the settings and that’s it.
- Open your browser and logging into the router by entering this URL >>http://192.168.1.1
- Enter the login details, default username and password both are “admin”
- You will see the webpage look like this given below:
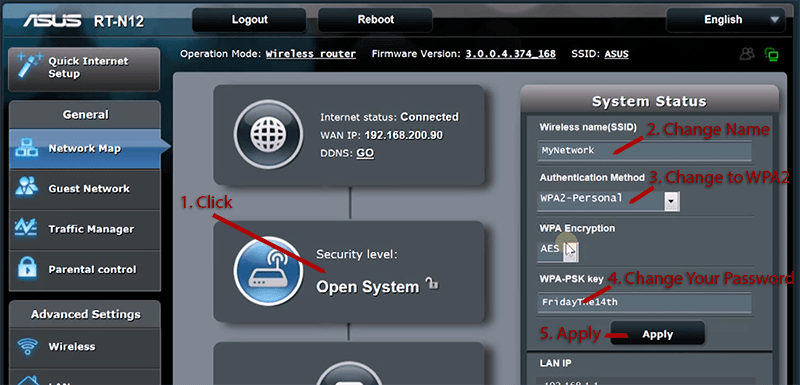
- After that click on the picture of the router in the middle of all options and that will shows you the wifi options at the right side of that webpage.
- Now you can change your passkey and hit apply after changing it, then reboot the router.
Step 1: Connect the computer to the router’s using an LAN cable.
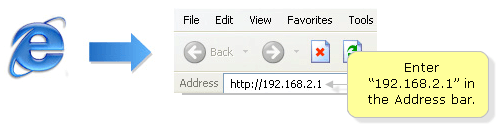
Step 2: Access the web-based setup page of your router by typing the Gateway IP address on the browser, Enter “192.168.2.1” in the Address bar and then press Enter.
Step 3: After that you will be redirected to the setup page of your router, just click on Login button at the top of the page.

Under that Login section, it will ask you to enter the administrator password. Default password is blank and if you saved some password at past then use it to open the main router config page.
Step 4 : Now select the “security’ option under the wireless tab from the right hand side panel and that will take you to your wireless setting, just change your password and save it to make changes.
Video Procedure
Expand the video to see it clearly.
Expand the video to see it clearly.
Source: http://www.trendnet.com/
- Log in to your Trendnet wireless router by entering http://tew-752dru or http://192.168.10.1 into the address line of your computer’s internet browser.

- For some security reasons your Router is normally pre-configured with some pre-installed password. You can also find that password on the sticker at the back of your router.
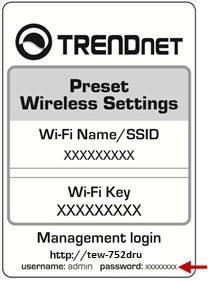
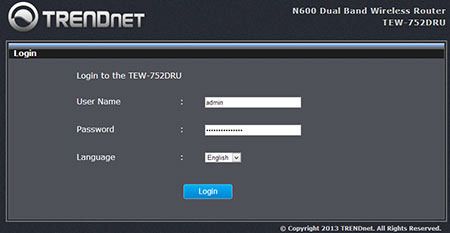
- After that it will ask you to enter your Username and Password, select your preferred Language, and then click Login.
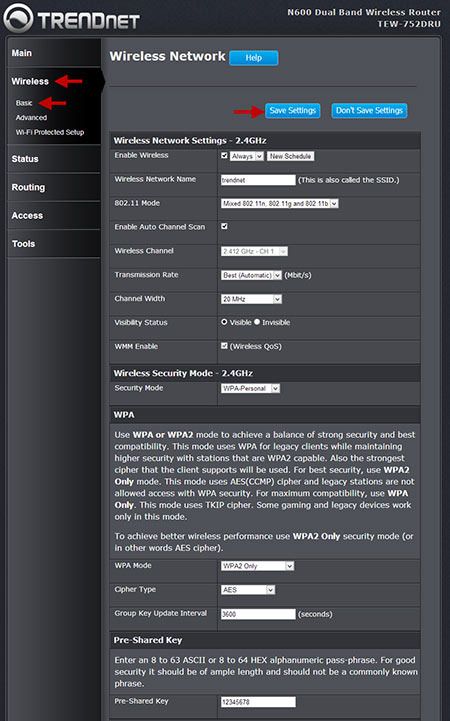
- Now click on “Wireless” and then “Basic” and it will open your WiFi configuration page where you can define the wireless network parameters here.

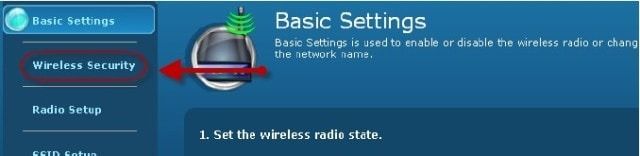
Select the “Wireless Setup” option in the main menu.

Select the “Wireless Security” option.
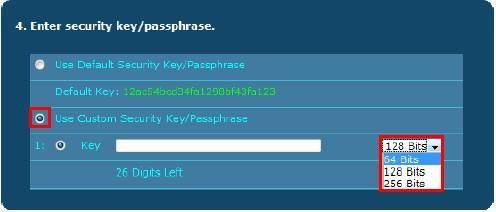
Select the “SSID” what you want to modify.

Change the custom key by entering your new password.
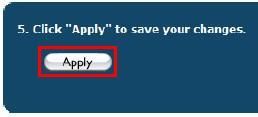
Click on “Apply” to save the current setting what you’ve made.
Hii guys, My name is Ganeshkumar and I’m a Computer Hardware Engineer and I proudly love to teach about computer software and hardware repairing stuffs. My hobby is blogging about computer problems solutions
2 comments
Click here for commentsthanks for Sharing Change WiFi Password
Replythanks for sharing a nice article
ReplyRouterlogin.net not working
routerlogin
routerlogin net
ConversionConversion EmoticonEmoticon